Django Extensions provides various features collection of custom extensions for the Django Framework. These include shell_plus, management commands, additional database fields, admin extensions e.t.c.
This article was originally posted at uchaudhary.com.np
Installation
As of now django-extension is of version 3.2.1. Install it with command:
pip3 install django-extensions
Configuration
Add the django_extensions package to the INSTALLED_APPS section of the settings.py file.:
INSTALLED_APPS = (
  ...
  'django_extensions',
)
This will make sure django-extensions is loaded when the app is started.
Features
Now let's look the features in detail. This extension consist of various management/shell commands.
1. Shell Plus
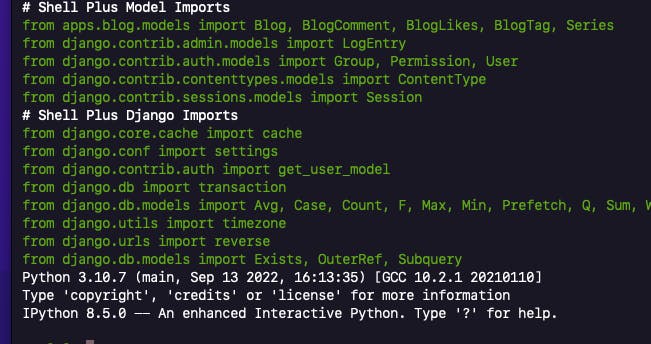
It is a enhanced version of django shell. It autoloads all the models to the shell. The following command can be used to fireup the shell_plus.
./manage.py shell_plus
We can configure Shell plus to use to use either ipython, bpython, ptpython or plain shell.
In the settings.py add the following below:
# Always use IPython for shell_plus
SHELL_PLUS = "ipython"
Example Screenshot:

Read more about the shell_plus from here.
2. Delete Squashed Migrations
Squashed migrations is a way to merge multiple migrations to single one.
The below command squashes migrations of blog app from 0001 through 0008.
./manage.py squashmigrations blog 0001 0008
This will generate a new squashed migration. Here is how the file structure looks right now.
├── 0001_initial.py
├── 0001_initial_squashed_0008_blogcomment_parent.py
├── 0002_blog_markdown_body.py
├── 0003_alter_blog_markdown_body.py
├── 0004_blog_views.py
├── 0005_blog_table_of_content.py
├── 0006_remove_blog_body_remove_blog_table_of_content.py
├── 0007_bloglikes_blogcomment.py
├── 0008_blogcomment_parent.py
Then the following command clean ups the migrations that are no needed.
# Delete leftover migrations from the first squashed migration found in blog
./manage.py delete_squashed_migrations blog
After this the file structure will only contain the squashed file deleting other migrations.
0001_initial_squashed_0008_blogcomment_parent.py
3. Export emails
The following command exports the registered user emails to a file.
./manage.py export_emails > emails.txt
The emails.txt File will consists of something similar as below.
"admin" <admin@gmail.com>;
"anonymous@gmail.com" <anonymous@gmail.com>;
"anotherone@gmail.com" <anotherone@gmail.com>;
"commenter@gmail.com" <commenter@gmail.com>;
"comment@gmail.com" <comment@gmail.com>;
"commenting@gmail.com" <commenting@gmail.com>;
"email@gmail.com" <email@gmail.com>;
"gamerboy@gmail.com" <gamerboy@gmail.com>;
"gumail@gmail.com" <gumail@gmail.com>;
"mycomment@gmail.com" <mycomment@gmail.com>;
"myemail@gmail.com" <myemail@gmail.com>;
"python@gmail.com" <python@gmail.com>;
"realadmin@gmail.com" <realadmin@gmail.com>;
"reply@gmail.com" <reply@gmail.com>;
"replying@gmail.com" <replying@gmail.com>;
"sdfsdfsd@gmail.com" <sdfsdfsd@gmail.com>;
"sdsf@gmail.com" <sdsf@gmail.com>;
"someemail@gmail.com" <someemail@gmail.com>;
"test@gmail.com" <test@gmail.com>;
"testing@gmail.com" <testing@gmail.com>;
"testingmarkdown@gmail.com" <testingmarkdown@gmail.com>;
"tryingfocus@gmail.com" <tryingfocus@gmail.com>;
"Umesh" <umesschaudhary@gmail.com>;
4. Generate Password
The following command will generate a random password for provided length.
./manage.py generate_password --length=8
This uses Django core’s default password generator
5. Graph models
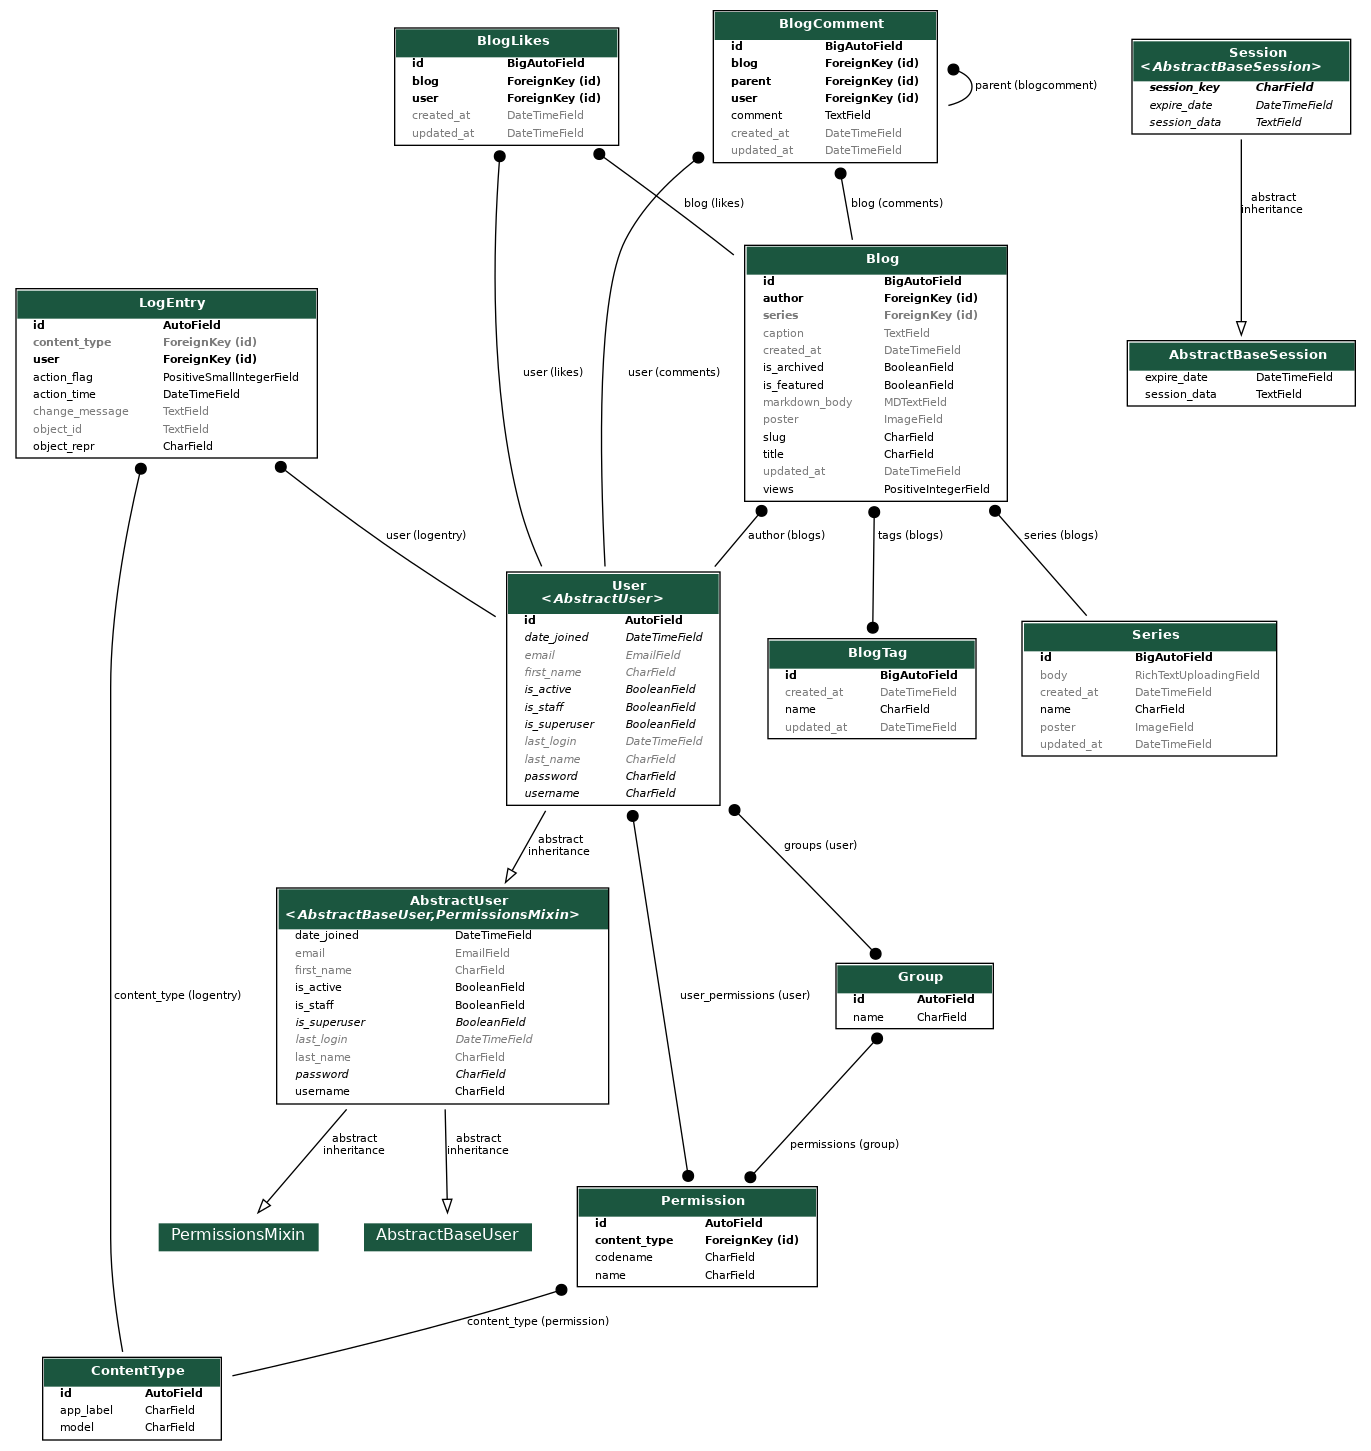
With django-extensions installed we can create an image of the database schema and relations by using the graph_models command:
./manage.py graph_models -a -o models.png
It requires either pygraphviz or pydotplus package to generate the graphs.
pip3 install pygraphviz
Also, the following packages is required to be installed on ur system.
apt-get -y install graphviz graphviz-dev #on debian system
It will generate a png file that looks like this.

6. Reset db
The following command will run DROP DATABASE and CREATE DATABASE thus resetting the database.
./manage.py reset_db --noinput
7. Admin generator
The following command will generate the admin code on console. Then they can be used on the admin.py file.
python manage.py admin_generator blog
That's a wrap
Furthermore there is more that django-extensions provides. Here is the official documentation that you can go through.
Happy Learning!

